We are Storebuilder and we make Inventory Management apps on Shopify. This is our experience converting our Wipeout app to Embedded SDK
Thankfully the Shopify App DEveloper community has gone over & beyond to create useful frameworks and instructions. See “Helpful Resources” at the end of this post. Special Thanks to Rafael Xavier of microapps for creating the frontend framework and Oren Solomianik of crmagic app (Triond) for writing about his experience especially the trick of using localhost during development both of whom have saved me countless hours of work.
How ESDK works at a high-level:
Shopify will embed your app’s web pages inside the Shopify admin page itself so storeowners are presented with a consistent UI. To do that they load your app’s web pages inside an iFrame. Good news is that because of the iFrame-loading, you can test ESDK from localhost instead of trying it out on a internet-accessible-server [1]. So you only have to worry about 3 things:
- Making sure that the app’s web pages look exactly like Shopify’s admin UI. Fortunately there exists a CSS framework for that [2]
- Change your app installation flow slightly to account for the iFrame
- Using the ESDK Javascript API to accomplish certain actions that are not allowed from inside an iFrame for security reasons.
Step 1: Create a sample app & enable ESDK
Creating a sample app is very important if you are doing this for the first time.
If you enable ESDK on an app and your app is not properly configured for ESDK then your app will break
So first try ESDK on a sample app.

Step 2: Point the sample app to your local dev environment

Step 3: Add a ESDK authorize page that wraps around the regular authorize page
In our case, from screenshot in Step #2 we need to map http://localhost:8080/esdk-authorize/ESDKTest to a new webpage. In that web-page add the following script and replace the values for shop_name, API_KEU, SCOPE & POST_AUTH_PAGE_URL:
<head>
window.top.location.href = 'https://test-shop.myshopify.com/admin/oauth/authorize?&client_id=API_KEY&scope=SCOPES&redirect_uri=POSTAUTHURL';
</head>
WHY?
As we are inside an iframe, redirecting the iframe to the OAuth page will break it. So we need to ask the parent to do the redirect. This redirect can't be done on server side, or the browser will block the OAuth page to be rendered. You need to do a full page redirect.
Step 4: Map the Preferences URL above to your existing app’s Preferences page
In our case, from screenshot in Step #2 we need to map http://localhost:8080/esdk-preferences/ESDKTest to the settings page of the app. This settings page is what is displayed to the storeowner who installs your app.
Step 5: Remove all CSS from your Preferences page like bootstrap etc and replace them with the SEAFF css framework below [2]
Step 6 : Enable ESDK in your Preferences page
This is how my Preferences page looks :
<head>
<link href="css/seaff.css" rel="stylesheet" type="text/css">
https://cdn.shopify.com/s/assets/external/app.js
 ShopifyApp.init({

apiKey: 'API_KEY',

shopOrigin: 'https://test-shop.myshopify.com'

});
ShopifyApp.ready(function(){
ShopifyApp.Bar.initialize({

icon: "http://me.com/app.png",

buttons: {

primary: {

label: 'Settings',

href: "/settings",

target: "app"

}

},

title: "Settings"

});
});
</head>
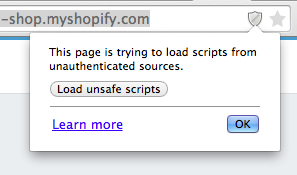
Step 7: in Chrome browser enable “unsafe” content to be loaded
UPDATE: You can use the fantabulous “ngrok” tool to create a https URL for your localhost! So you can skip this step if you are using ngrok. In fact I recommend using ngrok instead of localhost everywhere in this tutorial to simulate how the app will work in production
—
ESDK requires your website in iFrame is loaded in https
But your localhost url will not be in https
So in Chrome enable “unsafe” content to be loaded. http://stackoverflow.com/a/24434461/73935
Step 8: Install & Test ESDK by mocking up all the javascript
Load the following url to trigger an app-install manually. (See Step 2 above)
http://localhost:8080/esdk-authorize/ESDKTest?test-shop.myshopify.com
this will redirect to your app’s /authorize page
from there to your app’s /post-authorize page
and finally from there to your app’s /preferences page which will load inside an iframe within shopify’s website itself thus proving that esdk works for you
NOTE: If the iframe does not load inside shopify admin check if you performed Step 7 above to allow non-https pages to load
Step 9: Load all the shop-specific javascript through code
Time to replace the api_key and other placeholders and add the javascript through code instead of manually. This you have to figure out how to do using your favorite web framework.
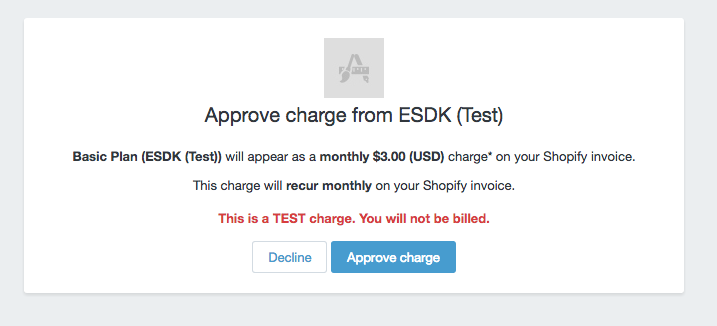
BONUS TIP: How to navigate to the billing upgrade page from within embedded SDK
Say you have a freemium app. You have a link inside the app that sends people to Shopify’s upgrade page with the price details. Turns out you cannot just navigate away from within the iFrame
Solution: Use the exact same javascript from STEP 3 above to escape the iFrame. Just replace the destination url with recurring_charge.confirmationUrl returned by Shopify’s RecurringCharge API
IMPORTANT NOTE FOR PRODUCTION:
Make sure that all your app’s authorize, preference & help URLs are in HTTPS://
See Step 2
Otherwise the embedded app will not work
Helpful Resources that I have to thank for:
[1] Embedded App SDK – My Experience, Thoughts and Constructive Criticism

hi i am integrtaing easdk how we can get the dynamic shop name .for now i have put static .Please reply asap
You’ll have to do that dynamically from the server-side controller.
I’m so glad I found this site. Exactly what I’ve been looking for. Thanks
Thanks so much. Exactly what I’ve been looking for
What POSTAUTHURL should i specify? The one currently I am using redirects me to another page so its never gets redirected to preference url nor I get OAuth page
POSTAUTHURL refers to this step of the app installation
https://help.shopify.com/api/guides/authentication/oauth#confirming-installation
I would recommend you first implement the app installation workflow without ESDK to understand how the flow works since it can be confusing for beginners. After that you can add ESDK flow on top of it once you know the app flow.
Thank you for sharing this useful information.